At around two years scissors can be introduced to toddlers. The traditional Montessori cutting activity involves a tray with a small pair of scissors in a pouch, strips of cardboard 1.5 centimetres wide, and a bowl to hold the pieces.

Once this task is mastered the next step is to use strips with straight lines drawn across them followed by diagonal lines, wider strips with curved lines, and then larger pieces with a circle or other shape.
Presentation
- Invite the child to the activity “I want to show you something…this is the cutting tray”
- Collect the materials together “this is how we carry the tray…now you carry the tray”.
- Indicate where to place the tray “put it here”.
- Name the items the child does not know already.
- Take the scissors out of the case and demonstrate how to hold them correctly. Open and close them a few times to show how they work.
- Take a cutting strip and make careful snips starting from one end. Hold the paper so that the pieces fall into the dish.
- Pick up any pieces that fall out “we’ll put that right here”.
- Let the toddler have a go “now it’s your turn”.
- When finished demonstrate how to place the cuttings in the bin, refill the tray with a cardboard strip if required, and return the tray to the shelf.
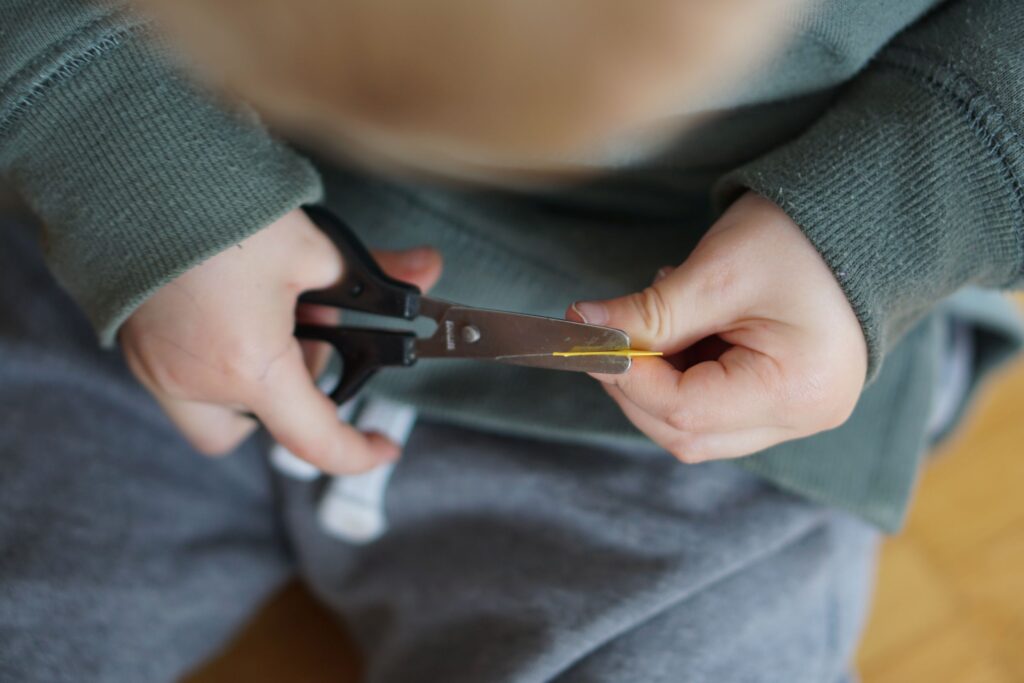
Notes on holding scissors
In the beginning, toddlers will need support to position their bodies and hands to correctly hold the scissors. Their elbows should be close to their bodies and thumbs always on top of the scissors “thumbs on top”. The paper strip should also be held with the thumb on top.
How the toddler places their fingers in the bottom loop will depend on the shape of the scissors. If there is room for just one finger it should be the middle finger with the index finger resting on top. If the loop is larger they might feel comfortable with the index finger and middle finger in the bottom loop.
The ring finger and pinky should tuck into the palm for stability. The idea is that when the ring finger and pinky are tucked into the palm the hand is in the same position required for holding a pencil. Therefore, holding the scissors this way from the beginning may help pave the way for an optimal pencil grasp later on.
Making it easier
If toddlers are struggling with scissors give them more practice with activities that require opening and closing the hand. Have them serve themselves with tongs at the dinner table. Use pegs to hang cloths on a low clothesline to dry. Bake bread to practice kneading. Work with Play-Doh or clay.
Toddlers who are really keen to start using scissors but are just getting frustrated might benefit from using spring-loaded scissors.
Variations
We use a separate pair of “kitchen” scissors in food preparation. Some examples include cutting green beans, herbs, lettuce, spinach, kale, cabbage, and dried apricots.
If there is something I need to cut I will offer it to one of the boys to do first. For example, cutting open a bag of pasta or other packaging.
I love this article all about scissor skills by Christie at MamaOT. She gives a wonderful description of the developmental progression of scissor skills as well as correct hand positioning.
Here are some ideas from her article:
- Place stickers on paper and have the child snip them in half.
- Place stickers in a line and have the child practice cutting forwards.
- Provide play dough to snip through.
- Use very thick lines to start with (1.25 centimetres).
- Provide corrugated craft cardboard and have the child can cut in between the ridges.
- Draw two lines of puff paint on cardboard and have the child cut in between them.
- Draw train tracks on cardboard and have the child pretend the scissors are a train.
