The traditional Montessori gluing activity is a chance for toddlers to refine their fine motor movements. Additionally, gluing activities are wonderful because they require the toddler to plan and carry out a specific sequence of steps to reach a goal.
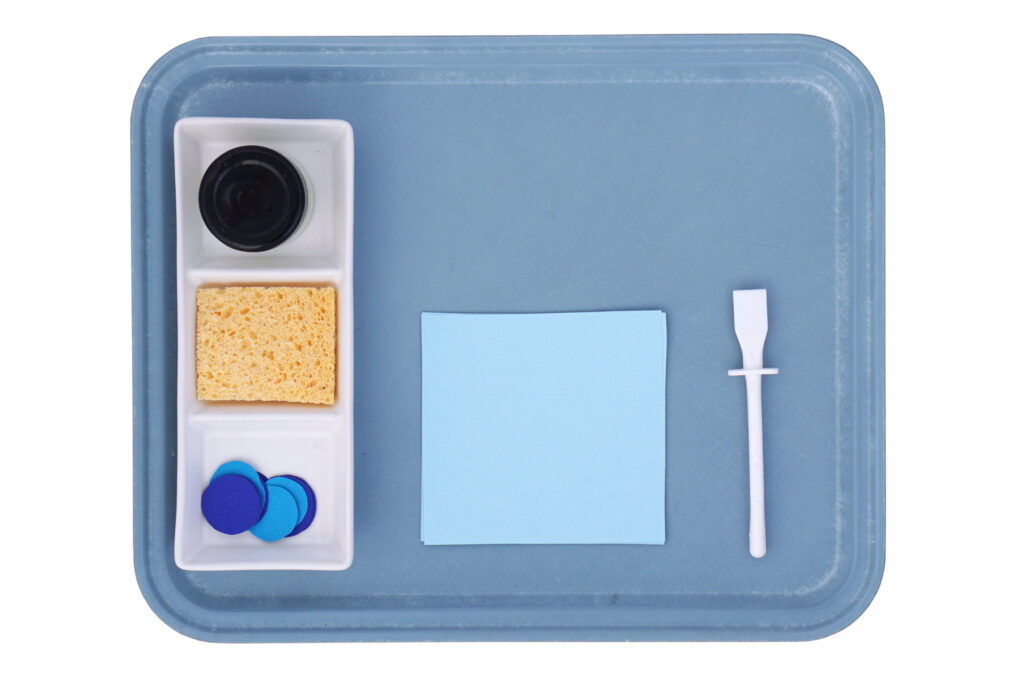
Materials
- Small pot of glue
- Spreader
- Small cloth to wipe spills
- Small coloured shapes
- Pieces of paper, approximately 8 x 10 centimetres.
Presentation
This presentation is based on what I was taught in my training but with some changes based on my experience and what I find works for me.
- Invite the child to the activity “I want to show you something…this is the gluing tray”
- Collect the materials together “this is how we carry the tray…now you carry the tray”.
- Indicate where to place the tray “put it here”.
- Name the items the child does not know already.
- Take a coloured shape and put it face down on the paper.
- With the spreader take a small amount of glue by brushing the top of the glue toward yourself.
- Hold the shape just with the fingertips, slowly spread the glue on, and then place the glue spreader down.
- Pick up the shape, turn it over, and push it down onto the paper. Toddlers love it when you really emphasise pushing the shape flat and say “push” at the same time.
- Take the sponge and clean up any spills.
- Let the child have a go “now it’s your turn”.
- When finished, demonstrate how to wash the spreader, replace the sponge and paper if needed, and put the tray away.
Paper size and thickness
To start out large shapes approximately 2.5 centimetres across cut from thick paper are easier for toddlers to handle. Smaller shapes can be introduced later when they have the hang of it.
The paper for gluing on to can be cut from regular paper. Small pieces are fine because toddlers will often glue just one shape on each piece of paper.
Gluing box or tray?
My experience has been that an open tray will catch a toddler’s attention easier than a closed box. This way they can also see when the contents have been swapped out for something new.
A popular setup is to use a gluing box with a lid that flips over and doubles as the work surface. I have found this setup a little fiddly for toddlers to manage. Firstly they need to be able to position the box so that the glue jar is on the bottom left-hand side. Then, once they flip the lid towards them, the box is so far back that they have to reach a long way to get the materials. I have found that a toddler’s arms are generally not long enough to manage comfortably. If the box is opened to the side, getting the lid back on the right way round can be frustrating.
Another advantage of using a tray, particularly if it is from a material other than wood, is that it is much easier to keep clean as the dried glue just peels off.
Glue brush or spreader?
I prefer to use a spreader over a brush because if it doesn’t get washed out properly the glue just dries and can be easily peeled off later. Additionally, glue spreaders have a spacer at the top stopping them from lying flat when put down which prevents glue from getting everywhere. The alternative is to use a brush with a brush holder which can be a little more fiddly but is worth a try with an older toddler.
Making it easier
If a toddler is not ready yet for gluing a good start is to use stickers. Stickers provide an opportunity to practice fine motor skills in preparation for using glue. Raised or textured stickers are easier for toddlers to pull from the backing paper.
Variations
Here are some variations on the traditional Montessori gluing activity:
- Using a squeezy glue bottle to provide an activity for hand strength.
- Substituting the paper shapes with pictures from magazines, printed pictures, sequins, natural materials, or anything that can be glued down.
- Using pictures that belong to a category such as leaves, flowers, vehicles, or animals.